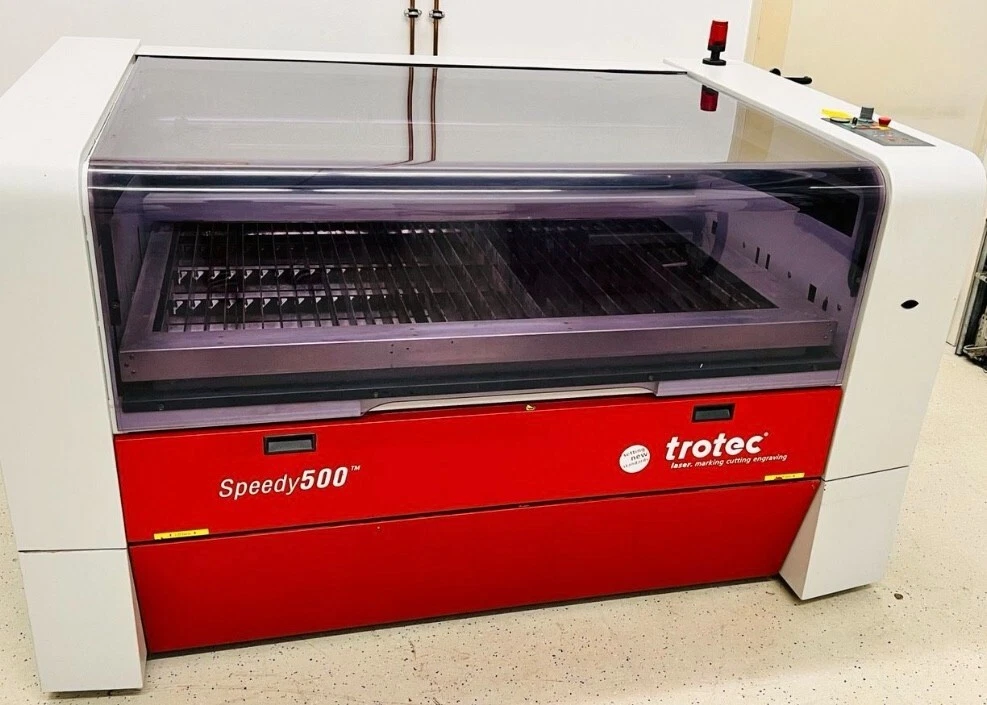
Laser Cutter at Kzoo Makers
See the laser cutter in action and imagine what you could make.
See the laser cutter in action and imagine what you could make.
Perfect for makers, small businesses, and creative experiments.
Our laser cutter can precisely cut and engrave wood, acrylic, cardboard, leather, and more. This guide explains what to expect from your first training, how to prepare files, and how to run a safe laser job at Kalamazoo Makerspace.
Before you run your first job, you’ll complete a hands-on orientation. You’ll learn:
After you are signed off, you can use the laser independently during staffed hours, following our posted safety rules.
Always confirm with the posted signage or your trainer. When in doubt, do not cut it until it has been approved.
Never cut: PVC, vinyl, unknown plastics, reflective metals, or anything that may release chlorine or heavy-metal fumes.
Ready to get started with us? Take a tour of Kalamazoo Makerspace or explore membership options to use the laser cutter and engraver.
Yes. All new users must complete a laser orientation or class with an approved trainer. This ensures you understand safety rules, basic operation, and our makerspace policies.
You can create designs in Inkscape, Adobe Illustrator, CorelDRAW, LightBurn, or similar software. We typically accept SVG, DXF, PDF, and standard image formats like PNG or JPG for engraving.
Yes, as long as they are on our approved list and clearly labeled. If you are unsure about a material, ask a volunteer or trainer before cutting. Unlabeled plastic is treated as unsafe.
Access to the laser is included with the appropriate membership level. You are responsible for your own materials. For the latest pricing and membership options, visit our membership page.
Many members use the laser to prototype or produce items for craft shows, Etsy shops, and small businesses. As long as you follow our usage policies and respect other members’ time, you can absolutely build your side hustle here.
Check out our dedicated 3D printing landing page to learn about available printers, materials, and training opportunities.
This section combines our in-house training with adapted material from Sculpteo's "Laser Cutting: The Ultimate Guide" and other lab handbooks. It's optional reading if you want to understand why the laser works the way it does and how to design better files.
Use this as a reference while you design projects for the Kzoo Makers laser:
You can skim this like a reference: jump to materials when you are picking stock, to file setup when you are exporting from Illustrator, or to applications when you want new project ideas.
Laser cutting is a digital manufacturing process that uses a focused laser beam to cut or engrave material. Instead of shaping material with blades or drill bits, the laser removes material along a path defined by a design file.
A laser cutter concentrates a large amount of energy into a tiny spot. Where the beam meets the workpiece, the material either melts, burns, or vaporizes, and a stream of gas blows the debris away. The result is a narrow kerf and a clean edge. With the right machine and material, you can cut sheet stock up to roughly 20 mm thick.
Because the laser follows a design in a vector file, it is ideal for repeatable parts, intricate patterns, and quick iterations. That same precision makes laser cutting a great partner for 3D printing, CNC routing, and traditional shop tools.
Next: Origins and Operating of Laser Cutting Back to Deep Dive Index
Before we talk about settings and materials, it helps to understand where lasers came from and how a laser cutter actually works.
The word "laser" is short for "Light Amplification by Stimulated Emission of Radiation". The idea grew out of early work on microwaves and radar. Physicists realized that if you could coax atoms into releasing light in a coordinated way, you could create a very pure, intense beam.
During the mid‑20th century, researchers like Charles Townes, Arthur Schawlow, Gordon Gould, and Theodore Maiman explored how to turn this theory into hardware. They first built masers, devices that amplified microwaves. Later, by moving to much shorter wavelengths and using special materials such as ruby crystals, they were able to create the first functioning lasers.
Early lasers were mostly scientific instruments. Colored laser beams made it possible to study how atoms and molecules absorb light with great precision, which transformed spectroscopy and other branches of physics.
Engineers quickly saw that a tightly focused laser could also act as a heat source. In the 1960s, labs began using lasers to drill tiny, accurate holes where traditional tools were slow or wore out quickly. Experiments with assist gases, especially oxygen, showed that combining a laser beam with a jet of gas could dramatically improve cutting speed and edge quality. This combination is the foundation of modern laser cutting.
By the late 1960s and 1970s, companies started putting lasers on the production line. Aerospace manufacturers used them to cut tough alloys and drill turbine blades. Automotive companies cut complex shapes in sheet metal. Over time, new types of lasers, better optics, and improved motion systems made the process faster, more reliable, and suitable for many more materials.
Today, laser cutting is a standard option in industrial fabrication, product design, and rapid prototyping. Thanks to desktop and mid‑size machines, it is also common in makerspaces, schools, and small businesses.
A laser cutter starts with a resonator that generates the laser beam. Depending on the machine, the active medium might be a gas mixture such as CO2, a solid crystal, or a fiber. Energy from light sources or electrical discharge excites the medium, and mirrors bounce the light back and forth until a beam emerges through a partially reflective mirror.
From there, mirrors and lenses guide and focus the beam down to a fine spot at the work surface. The machine keeps a small, controlled gap between the lens and the material so the beam stays in focus. Assist gases such as oxygen, nitrogen, or air blow through the nozzle to clear molten material from the kerf and influence how the cut behaves.
Most makerspace machines use a gantry system that moves the beam in X and Y above a flat bed, similar to a plotter. Some industrial systems use galvanometer mirrors for high‑speed engraving or multi‑axis motion to work on 3D shapes.
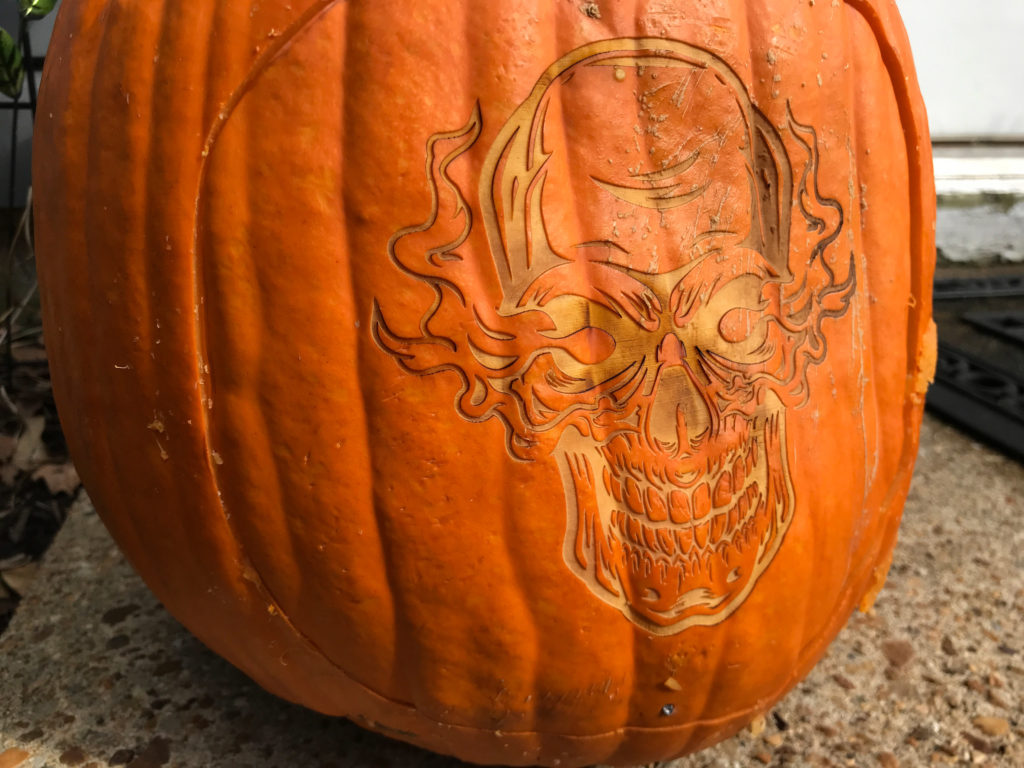
In practice, laser cutters perform three main operations:
Your vector file decides which operation the machine performs. Typically, different line colors and stroke settings are mapped to "cut", "score", or "raster" in the laser software. For example, many workflows use a thin red hairline for cuts, a thin blue line for scores, and solid black fills for raster engraving. Always follow the color legend and templates posted next to the laser you are using.
All of these operations are affected by kerf, the width of material that is actually removed by the beam. Thicker materials need slower speeds and higher power, which makes the kerf wider. If you are designing parts that fit together (press‑fits, tabs, or box joints), prototype a small section of your design and measure the fit so you can compensate for kerf and material tolerance.
Kerf can also be used creatively. By cutting repeating "kerf cut" patterns into rigid sheets such as plywood or acrylic, you can make them bend like a woven material. Different patterns produce different bending behavior, from smooth curves to living hinges.
Compared with traditional cutting tools, a laser has several advantages:
For makers, that combination means you can move quickly from idea to prototype, then refine or scale up without changing tools.
Laser cutters follow instructions from a digital design. Understanding files and materials is just as important as knowing which buttons to press on the machine.
Lasers can process many different materials, but not every material is safe or practical on a CO2 machine. In general, sheet thickness up to about 20 mm is possible on powerful industrial equipment; our makerspace machines typically handle much thinner stock.
Below is a simplified overview based on common makerspace and lab practice. Always follow the posted materials list and safety rules for the specific laser you are using.
MDF and similar fiberboards can cut well on a CO2 laser, but some labs have stopped using them due to smoke and binder fumes. If you plan to cut MDF or engineered boards, confirm that they are allowed at Kalamazoo Makerspace and follow all ventilation rules.
The following categories are based on the "cannot cut" lists used in many teaching labs:
Materials that contain chlorine compounds (for example, many PVC and vinyl products) release corrosive and toxic fumes that can severely damage the machine and harm people. If you are not 100 % certain what a plastic is, treat it as unsafe until a trainer has inspected and approved it.
These four materials show up again and again in hobby and professional projects. Each has its own personality:
Inexpensive and easy to cut, cardboard is great for mock‑ups, packaging trials, and kids' projects. It is light and stiff, can be folded, glued, taped, and painted, but it is not durable and reacts badly to moisture and open flame.
Acrylic is a rigid plastic available in many colors and thicknesses, including clear, translucent, opaque, fluorescent, mirrored, and two‑tone engravable sheets. Laser‑cut edges come out glossy and "polished". Acrylic can be brittle, so sharp corners and post‑drilled holes need extra care.
Plywood is made from thin veneers of wood laminated with alternating grain directions. It balances strength, stiffness, and weight, and it engraves nicely. Thickness can vary slightly between batches, and cut edges may leave a light char that can rub off.
MDF is a smooth, uniform panel made from wood fibers and resin. It cuts cleanly on the laser and takes paint or finish well. It is heavier than plywood, not happy in damp environments, and does not have high mechanical strength, but it is excellent for prototypes, fixtures, and decorative items.
Laser cutters expect a vector file that describes paths, shapes, and colors, not just pixels. The file tells the machine where to cut, score, or engrave. Common formats include SVG, PDF, AI, CDR, DXF, and DWG, depending on your software and workflow.
You can create these files in many programs:
Whichever tool you choose, make sure your document uses the correct units, your geometry is scaled accurately, and paths are clean (no tiny gaps or duplicates). Our practical laser guide above and shop volunteers can help you confirm that your first files are ready.
Even in a makerspace, your laser jobs are limited by machine time and queue length. Good design habits will save you money, reduce frustration, and keep the machine happier.
Overlapping geometry is one of the most common causes of slow jobs and burn marks. If two vectors sit on top of each other, the laser will trace the same line twice.
SelDup (Rhino), OVERKILL (AutoCAD), or "Purge coincident duplicates" (Vectorworks) can help detect extra geometry.Both scoring lines and rastering areas can add a lot of character to your design, but they have very different time costs:
In one lab example, a city map engraved as vectors took about 11 minutes, while the same map rastered as a filled image took around 65 minutes. Wherever you can, favor vector lines and use raster fills only where solid shading or photos are truly needed.
It is tempting to engrave every brick, shingle, or pixel, but extreme detail can dramatically increase job time without adding much clarity. Often, you can "imply" a texture with a lighter pattern of lines or dots and let the viewer's eye fill in the rest.
Type > Create Outlines (Shift+Ctrl/Cmd+O) and view in Outline mode (Ctrl/Cmd+Y) to see what the laser will follow.TextObject or explode text into curves.TXTEXP (where available).Text > Convert Text to Polylines.These habits keep your jobs affordable and make you a good citizen of the laser lab, reducing wear on the machine and helping everyone get through the queue faster.
At Kzoo Makers and similar spaces, laser cutting shows up everywhere: signage and displays, storage and enclosures, custom jigs and fixtures, and the frames and panels that hold robots, drones, and electronics together.
One of the most visible uses of the laser in a makerspace is signage and decor. You can combine cut shapes, engraved lettering, and layered materials to create crisp, professional‑looking pieces without needing a print shop.
Because vector files are easy to tweak, you can quickly update designs for new events, members, or branding.
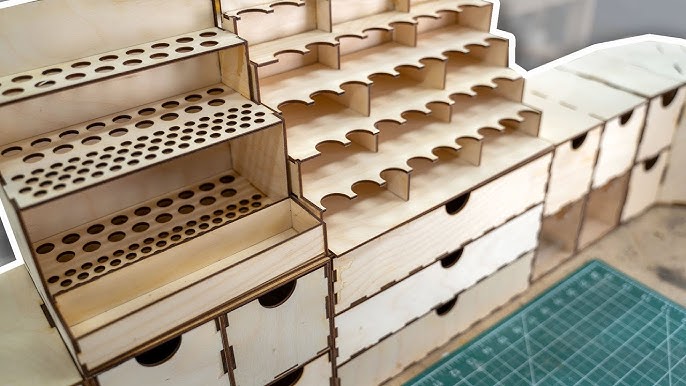
Tabbed boxes and flat‑pack enclosures are a natural fit for laser cutting. With a few parameters—material thickness, box size, finger joint style—you can generate patterns that interlock cleanly and assemble with glue or screws.
Tools like online box generators (for example, Makercase) and nesting utilities can speed up layout, but the core idea is the same: use precise kerf‑aware joints to turn flat sheets into sturdy 3D objects.
Laser‑cut jigs and fixtures make the rest of the shop more accurate and repeatable. Because they are quick and inexpensive to produce, you can iterate until a design is just right.
Once a jig proves useful, you can cut more copies for other members or tweak the file for different sizes and tools.
Many robotics, RC, and electronics builds combine 3D prints, off‑the‑shelf hardware, and laser‑cut sheets. The laser is ideal for flat structural parts, mounting plates, and clean front panels.
At Kalamazoo Makerspace, it is common to see laser‑cut panels paired with 3D‑printed brackets and metal hardware to create sturdy, serviceable prototypes and small production runs.
Laser cutting is one member of a broader family of computer‑driven tools that turn digital designs into real‑world objects.
Because laser cutters work from 2D geometry, they pair well with 3D printing, CNC routers, water‑jet cutters, vinyl cutters, and more. You can laser‑cut flat parts, print complex 3D components, and combine them into assemblies that would be hard to make any other way.
For makers, the key ideas from this deep dive are:
If you want to go even deeper, there are excellent external tools and resources that build on the concepts in this guide: automatic nesting utilities such as Deepnest.io, box‑generator tools such as Makercase, and kerf pattern libraries from manufacturers like Trotec that showcase flexible‑cut templates and engraving ideas.
At this point, you have both the practical steps and the theory in one place. The next step is simply to schedule laser training, bring an idea, and start experimenting.